Learn
Beginner to Advanced Drawing Fundamentals
Guide
Exercises are standalone, however, for the best experience, proceed chronologically.
Getting Started
These are exercises and are meant to be done as practice. Their purpose is listed under each exercise. Don't worry about how they turn out, success will be determined by how well you meet the requirements. Bring your mind to your breath, forget what you know, and do it.
Demonstration Videos
Each LESSON section contains a free video demonstration recording of the exercises done live on my TWITCH art stream.
Currently the whole playlist is available HERE.
Questions? Ask me!
If you need further guidance feel free to contact me on my TWITCH live stream or join our art community on DISCORD.
+ Materials
- Charcoal (or Graphite) Pencil/Stick
- Eraser (Kneaded and Vinyl)
- 18" by 24" Newsprint/Drawing Paper
- Large Clipboard for holding paper vertical
- Ink, Brush, Stick/Pole, Tape, and Water Container
+ Optional Materials
- Still Life Setup (Bottles, objects, foods, etc.)
- Sandpaper and Utility Knife
- Charcoal Powder and a Chamois Cloth
- Acrylic, Brush, and Water Container
Additional and more specific materials can be found under each exercise in corresponding LESSON sections
+ Critique/Discord
Upload your assignments for critique under each exercise or on our Discord under #drawing_lesson
+ LESSON 1 - Sharpening, Line, and Value
Brief review of drawing fundamentals. Improve your connection to your tool, quality of line, and understanding of light.
- How to sharpen your pencils in order to maximize line quality
- How to use your arm while drawing
- Ghosting a line and alternating line quality
- The mechanics of light
- Bringing dimensionality to a drawing through the use of value
+ LESSON 2 - Blind Contour
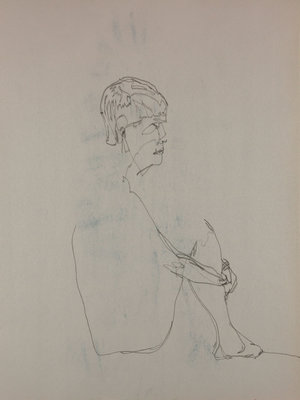
Now that you've learned the proper way to make a mark on the paper it is time to learn how to observe your subject. You must forget what you know about drawing and allow your eye to connect directly to your hand.
- When children first begin to draw they are likely to depict the symbols of what they see rather than what is actually there
- Blind Contour is an exercise which, when done correctly, will remove the interference of the mind from the mechanical application of the line
- Envision your tool as an extension of your body. If you do this correctly the world should fade and you will only perceive the contour and your breath
+ LESSON 3 - Modified Contour
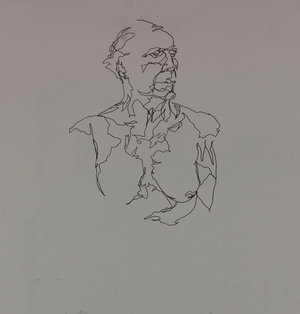
This exercise is also used to connect your eye directly to your hand and remove any interference of symbols applied by the brain. The difference is that now you will sometimes be allowed to look at the paper during the exercise as long as you aren't moving the pencil
- Modified Contour should be attempted only after you are satisfied with LESSON 2 - Blind Contour
- Modified Contour is an exercise which, when done correctly, will remove the interference of the mind from the mechanical application of the line. Being allowed to look at the paper will help you fix your angles and gain proportion in your eye-to-hand connection
- Envision your tool as an extension of your body. If you do this correctly the world should fade and you will only perceive the contour and your breath
+ LESSON 4 - Blind/Modified Cross Contour

This exercise is also used to connect your eye directly to your hand and remove any interference of symbols applied by the brain. The difference is that now you will be exploring a more dimensional axis of the subjectl
- Cross Contour should be attempted only after you are satisfied with LESSON 2 - Blind Contour and LESSON 3 - Modified Contour
- Cross Contour is less of an important exercise, don't be afraid to skip this lesson, infact it's healthy to explore LESSON 5 before coming back to LESSON 4 as a refresher on CONTOURS
- Cross Contour is an exercise which, when done correctly, will remove the interference of the mind from the mechanical application of the line. You will now learn to see the subject in a more dimensional way as you explore it's cross-section
- Envision your tool as an extension of your body. If you do this correctly the world should fade and you will only perceive the contour and your breath
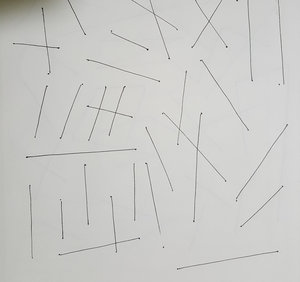
+ LESSON 5 - Figure Gesture

Imagine if the figure were to animate for a moment, how do you capture that in your work? With gesture we explan the movement of a figure using simple lines.
- Before beginning take a good portion of your allotted time in order to observe (and actually see) your subject. Whether the exercise is 15 seconds or 30 minutes, this step is crucial to the process so take your time.
- Use simple lines tapered lines to capture the gesture. A gesture may be complete after a single line or fifty.
- We will do exercises using various techniques, even scribbling a continuous line.
+ LESSON 6 - Negative Space and Background versus Foreground

Materials: Ink and Brush
Alternative materials: Watercolor, charcoal stick, or whatever medium you have
- Learn to separate the drawing into a background and foreground (subject/figure)
- Find the negative space, observe it's basic shapes, and block it in.
- Do not attempt to draw out the figure itself with the block in by blocking in an outline. Draw the negative space only.
+ LESSON 7 - Figure and Head Proportion
An explanation of sizing proportion with your drawing tool and the common proportions used to depict a figure.
- Observe and measure the subject properly in order to get your eyes to see the figure for the proportions actually present rather than what your mind happens to percieve
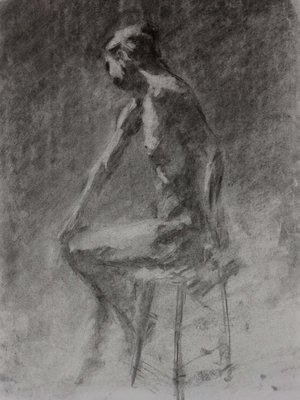
+ LESSON 8 - Value Scale and Shading Techniques

Bring dimensionality to an object by drawing its tonal elements. it's shadows and lights.
- Discern the scale at which the light changes and apply it to a simple two dimensional contour.
- Experience various methods of excercsing and rendering value through alternate techniques: Cross-hatching and the charcoal reduction techniques.
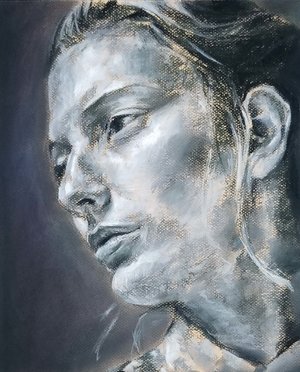
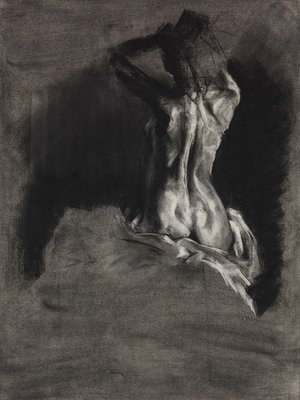
+ LESSON 9 - Figure Shading and Lighting
Vary the transition and scale of value of value of the background, figure light, and figure shadow.
- Give each element of the light falling on the figure it's own scale of value (1-10, 2-4, 7-3) in order to exercise discerning it's basic shapes and properties.
+ LESSON 10 - Figure and Portrait Anatomy
A look at the fundamental and universal shapes, proportion, and function of the human body, it's skeletal system, and it's muscular system.
+ LESSON 11 - Color and Light
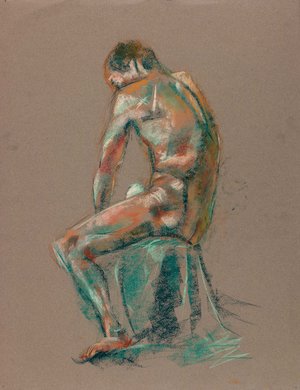
Materials: Pastels, watercolors, color pencils, or any colored media
- A quick review of how color translates to the dimensionality and value of a figure
- An exercise on applying these mechanics to a figure drawing